 PlugPress
Connect ChatGPT to WordPress
You can connect ChatGPT to your WordPress site with the Saddle plugin, so ChatGPT can read your posts and pages, write content, and help manage your site. ChatGPT connects differently from other AI apps: instead of pasting a sign-in key, it signs in through your WordPress site with OAuth — the same way “Sign in with Google” works. Everything runs on your own website; no third-party server sits in between.
What do I need before connecting?
- A WordPress site served over HTTPS with the Saddle plugin installed.
- Pretty permalinks enabled (Settings → Permalinks, anything other than Plain).
- A ChatGPT plan that supports custom connectors (managed in ChatGPT’s settings).
Why does ChatGPT need OAuth instead of a key?
Most AI apps let you paste a sign-in key into an HTTP header. ChatGPT’s connector screen has no field for one — it only offers “no authentication”, an API key, or OAuth. So Saddle includes its own sign-in service that lives entirely inside your WordPress site. It is off by default; you turn it on only if you want ChatGPT connected, and every other app keeps working either way.
How do I connect ChatGPT to my WordPress site?
Step 1: Turn on Sign-in for ChatGPT in Saddle
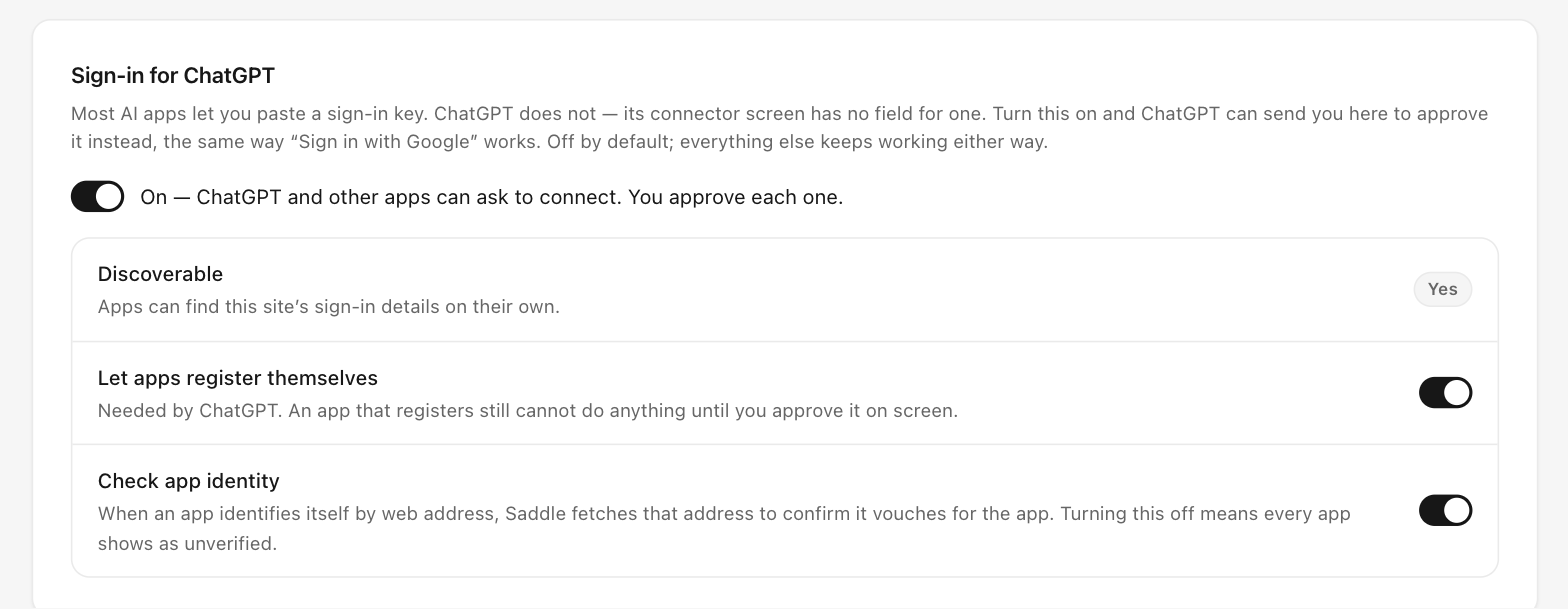
- In your WordPress dashboard, go to Saddle → Settings.
- Find the Sign-in for ChatGPT card and switch it on.
- Make sure Let apps register themselves is on — ChatGPT needs it. An app that registers still cannot do anything until you approve it on screen.
Step 2: Get your connector details from Saddle
Go to Saddle → Connections, click Connect an app, and choose ChatGPT. Saddle shows exactly what to enter — your server name and address, already filled in for your site:
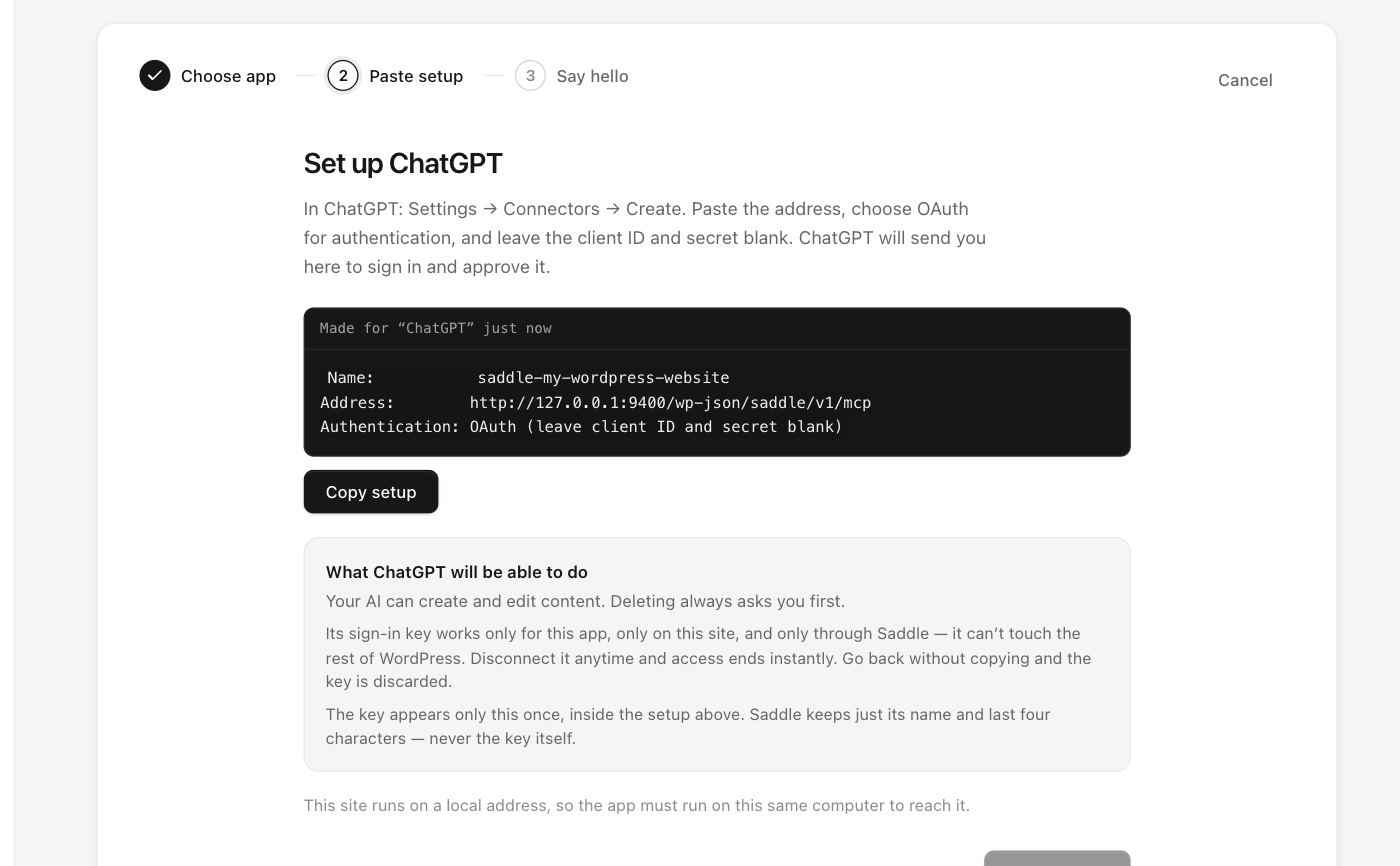
Name:           saddle-your-site
Address:        https://your-site.com/wp-json/saddle/v1/mcp
Authentication: OAuth (leave client ID and secret blank)
Step 3: Create the connector in ChatGPT
- In ChatGPT, open Settings → Connectors and click Create.
- Enter the name and address from Saddle.
- Choose OAuth for authentication and leave the client ID and client secret blank — ChatGPT registers itself with your site automatically.
- Save the connector.
Step 4: Approve the connection on your WordPress site
ChatGPT sends you to your own WordPress site to sign in and approve the connection. Saddle’s consent screen shows what ChatGPT is asking for; approve it and you’re sent straight back to ChatGPT.
The access you grant can only ever be equal to or lower than your site’s access level in Permissions — a connector can never get more power than the site allows.
How do I know the connection works?
In a ChatGPT chat, enable your new connector, then ask:
What can you see on my WordPress site?ChatGPT should report your site name, WordPress version, and content counts. The connection also appears in Saddle → Connections, where you can watch its activity or revoke it at any time.
ChatGPT can’t find or connect to my site?
- The toggle is greyed out — your site needs HTTPS and pretty permalinks first; the Settings card tells you which one is missing.
- “Discoverable: Maybe not” in Saddle Settings — your WordPress may live in a subfolder, or your host blocks addresses starting with a dot (
/.well-known/). Most apps still connect; ChatGPT may not — ask your host to allow those URLs. - More fixes in Troubleshooting and FAQ.